

Four standard colored copier paper folded in half

Cut along the fold, eight half sheets. You only need seven. All of the folding, cutting, drawing and glueing for the seven flowers can be done quite rapidly.


Fold one edge in half. This will allow you to cut half the top of a petal, flipping it back provides a symmetrical template for the other half of the petal, in reality, a whole stack of eight petals all at once.


You can actually do all seven petals at the same time.


Prearrange them and pre-glue dot them for stacking. Here's how they're stacked. ↓
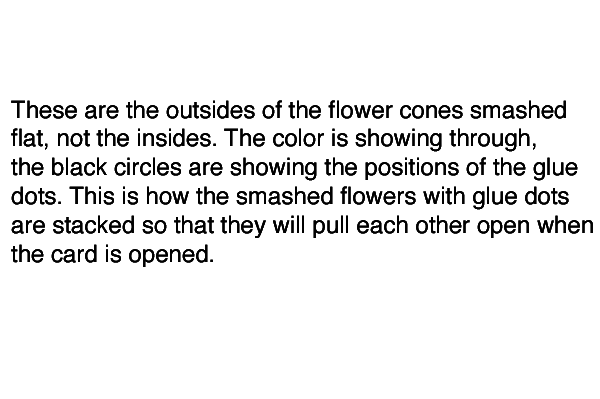

This is what the glued stack looks like. It will be glued inside a card tucked against the central fold. Tuck and fit first, then glue one side at a time.

This is a specific background that has meaning to a specific person. I do not recommend a road map for an ordinary card.

Tuck into the crease and glue one petal on one side. Close the card on top of the glue.

Flip the card, open it, to the unglued side. Glue the unglued side, close the card again.

After it dries, when the card is opened, the glued together petals drag each other open and force the flowers that are not attached to the card upward and outward. it is awesome and it is delightful. it is an idea that can be elaborated ridiculously. For the record, it is actually easier and faster to fold the paper, cut the petals, draw the flower inside bits, and glue them together, than it was to get my printers to cooperate to print the background. This card is actually quite fast to make. It was much more difficult to photograph it and to write this page then it was to make the pop-up portion of the card. Because this was so simple, I decided to make something of a project of the cover.
Cover


I dont know how to requite your favour.. Why dont choose the best pop up 3d cards for you. Get it on http://popupcard.net.. You can view too many design from this website.
ReplyDelete