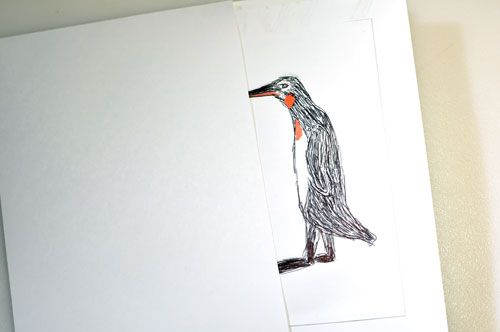
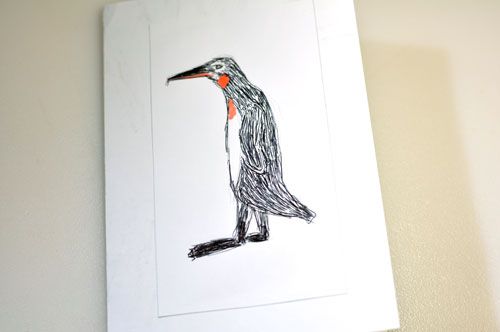
This card was made a long time ago by playing around but never mailed or used. Looking back at entries made when I first started describing these things I noticed that and thought, "Shame to waste a perfectly serviceable pun innit." I've hardly mined the depths of that whole [you : ewe] thing and I do resist giving it up, plus my whole family generally responds positively to dumb jokes.
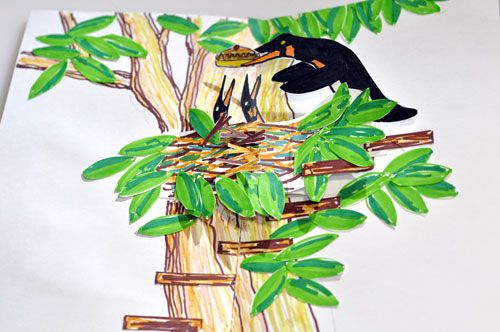
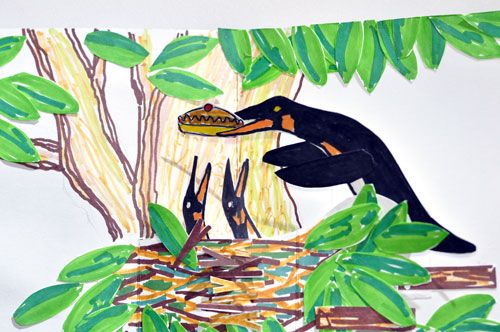
Now is the time of year that three birthdays coincide, and whereas I should be thinking up something fresh and unique for each person, instead, I revitalized the original idea already described here and produced the same card for each person. You might prefer that link ← for a more thorough description of a single card. In some ways it is a better card. This page describes the production of three cards at once.
Three cards for one effort makes me feel like bum because I am not thinking exclusively of one person while making them. On the other hand it also make me feel like a Henry Ford type and I don't imagine Ford agonizing over the impersonal aspect of assembly line production.
If the term speeding can apply to coaxing a printer to true color with fresh cartridges for two hours then printers do indeed speed things by eliminating the need to paint backgrounds.

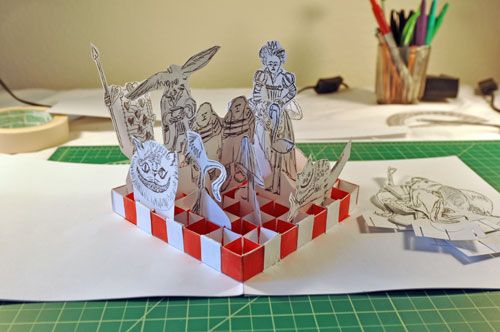
These wide straps ↓ are the basis of this card. Each card has two. They veritably cover the background so they are provided the same pattern. They are used to displace a segment of the central fold and double it.
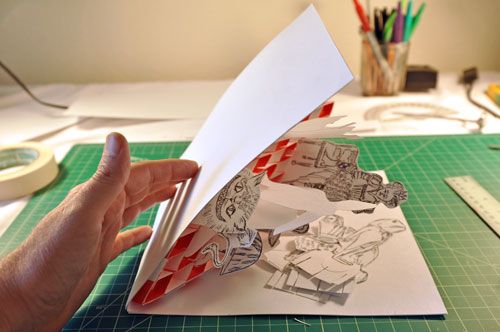
See, the central fold of the card is the powerhouse for pop-up mechanisms and so often mechanisms are build directly upon it to avail its leverage directly. That puts pop-up things dead center of the card every time. A strap placed across the central fold eliminates the central fold in the area of the strap by inverting the valley of the original card to a peak of the strap while simultaneously creating two new valleys on each side of the original valley at the places where the straps attach to the card, which turns out to be vertical lines that imitate the central fold. It is these two valleys that are created by the attachment of the strap that imitate the central fold and not the peak of the strap that interests us. In a way, it is like two smaller cards within a card. It also moves content farther out toward the edges so whatever pops up must now be shorter. Each card has two straps producing four central fold displacement segments.
The straps shown below are not yet tented. At this point I do not know exactly where that crease will be, the one that inverts the central fold. What we see are the end tabs bent upward. Those tabs can be glued on the surface of the card or inserted through slots and glued to the back of the card. Either way, the line that is formed by the bent tab is the new displaced central fold. There are two for each strap. When the strap is tented, then the strap becomes the new recto leaf to the new little card, and the original card itself (with the new tab above, or below through a slot) is the verso side of the new little card. Opposite for the other side of the strap, the strap is verso page of the new little card and the original card (with tab) the new recto.
So these straps when they're tented become the verso and recto leafs of two new smaller cards that are grafted onto the original. When tented and inserted inside the main card the strap appears to be a card within a card attached with tabs and operating in the opposite direction to the original larger card, and that is correct, but we are ignoring the peak of the strap and instead we are using the connecting points (lines) of the strap and treating the strap when tented as two sides to two new smaller cards that operate in the same direction as the original card.
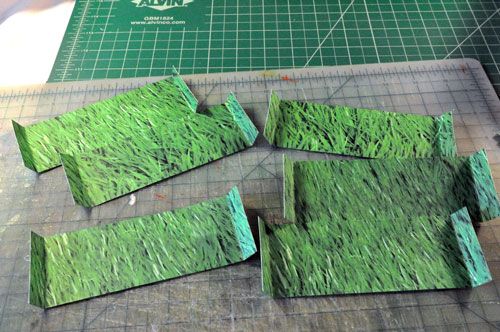
* The straps are printed with the same grass pattern as the background.
* The straps can be off-centered.
* Straps should be short to keep content built on them away from the edges. These are a bit long and so content that stands up on the straps must then be short in order to fold inside the closed card since they are so close to the edges. Some areas of the card closest to the center will not be affected much by this constriction, but most areas will. So the constructor must test with each new addition of content to make sure that it fits inside when the card is closed.

The peaks created by the two straps in each card do not interest us presently, it is the valleys that these straps are about. You can see that at 45º the straps form two little cards that are opposite to the main card. Viewed another way, the straps also create four new valley creases where they attach and a tent atop the original valley segment. You can also see that when the card is opened flat then the straps too will lay flat directly on top of the opened card, and opening such a card fitted with two broad straps will be like opening five cards simultaneously, the main card and the four smaller cards contained therein.
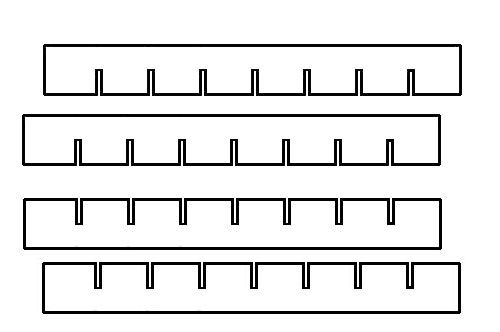
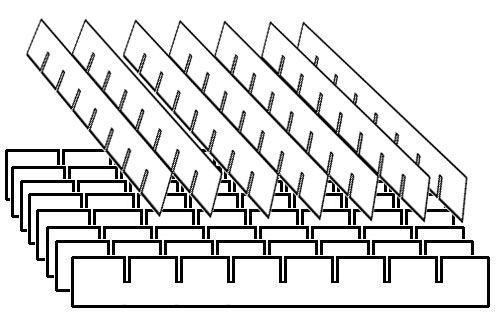
V mechanism strips are prepared for each new valley fold created by the strap attachment loci.
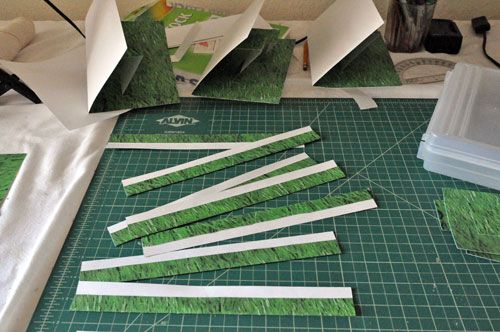
These strips with grass pattern on one half and white on the other will be bent twice to form V mechanisms at each new displaced central fold created by the larger straps. The grass sticks up and the white is glued.
These strips are a little more complicated than usual because the grass pattern is needed on the front and back. That is a style decision. The strips can be whipped out quickly and in great number, but because of the printed pattern these strips must be folded over for the upright portion but not for the tab portion. That doubles the density of the card stock along the strip. I would rather have not doubled the card stock for these mechanisms just to have pattern on both sides. Here is where painting would have been better (or printed on both sides). The result is that single strength straps force double strength V mechanisms that flip up content that is already diminished because the straps forced content to the edges of the card. Mechanistically, it is not a great idea. If anything, the straps should be double strength and the V mechanism single strength, but it did not work out that way this time because of the perceived need for pattern on both sides.

The areas on the standup V mechanisms shown in blue are the places where content can be glued.
The tabs that attach the straps onto the card background are not shown. They would complicate the diagram unnecessarily, obviously the straps must be attached somehow. You can make whatever kind of tabs you like; built into the strap as done here, separate pieces glued to both the strap and the background which I do quite often, glued directly on top of the background image, or inserted through slots and glued to the back of the page to make them disappear from the surface. In this case, the background image is grass so it doesn't make any difference at all if tabs with the same pattern are glued to the top or glued underneath.
All that up there ↑ is mechanisms and background , all this down here ↓ is content.
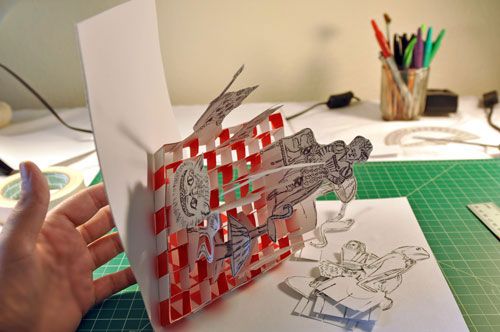
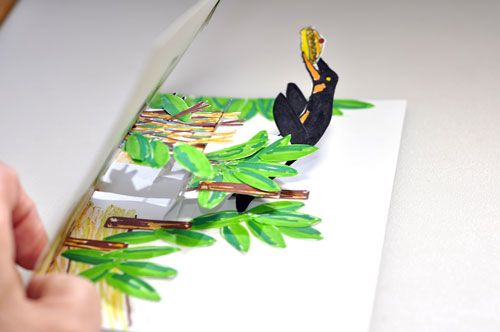
As the animated GIF suggests, straps can be located anywhere across the central fold. The closer that the strap is to the viewer then the closer that the V mechanisms attached to it are to the viewer. The V mechanism fold forward toward the viewer when the card is closed and flip forward all the content that is attached to them. The content attached to the two V mechanisms closest to the viewer risk sticking out beyond the bottom edge of the card. The placement of the straps and their attendant V mechanisms is somewhat random in that the space for content is not actually measured, although now that the V mechanisms are in there is no reason not to measure. Different size sheep are provided for for this variation and for error.
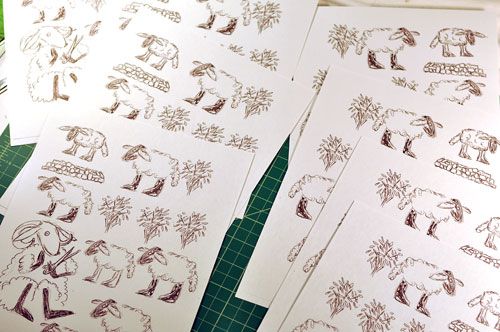
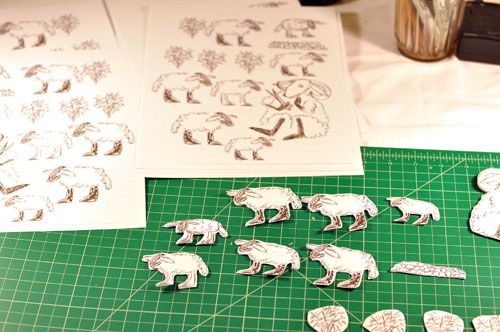
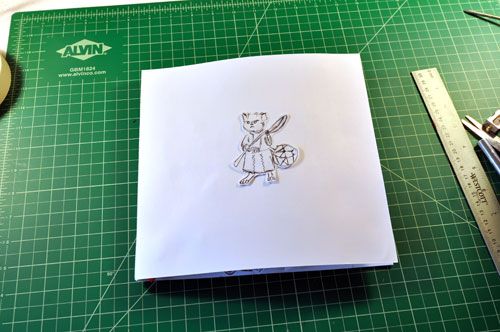
The content needn't be detailed on both sides, but this content is. A page of sheep content is uploaded and available for download. The page is mirrored so that pages can be matched and the content of both sides cut out at once and glued together.
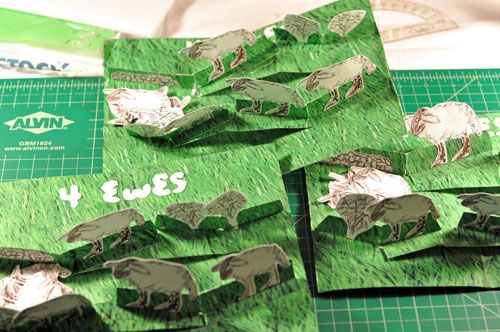
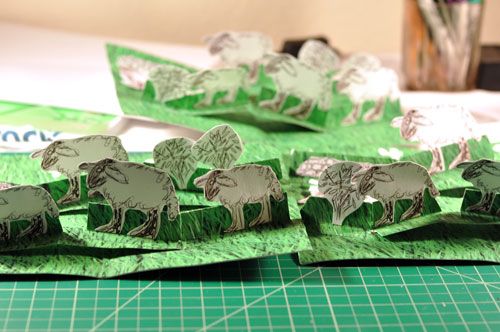
You just gotta see these things in action. The strap inside lifts upward to a folding tent when the card closes, which forces the V mechanisms attached to them downward and forward. Because half of the V is the original card, then content attached to that half of the V simply pushes forward and downward, but the half that is lifted upward by the strap while also being being forced forward and downward by the V it is attached to flips both forward and inward. It is marvelous to watch this paper sheep go flying upward, flipping forward, tucking inward as the card closes and while the bush right next to it simply falls forward. It's like you planned it that way or something when in fact that's just the way it turns out. In two cases, the straps were positioned too close to the front edge. Luckily, I preprinted different size sheep for that exigency. A little trim to their hoofies and they fit right in, that is, larger sheep stuck out when the card is closed. The straps having moved content from the center to the edges.
Review: Without straps, V mechanisms can be positioned on the center fold of a card. The upright V provides two surfaces to attach content, as you can see, content angled toward the viewer. A short tented strap covers the central fold and provides two new valley folds closer to the edges.
Mind the edges.
Two flat straps displace large segments of the all-important central fold and double them. Anything that would be ordinarily placed on the central fold can now be placed next to where it would have been before the strap moved the central fold, and now there are two of them and the content placed on them must be shorter. Central fold mechanism-backbone availability is doubled but the content placed on those mechanisms will be shorter.
It's a good way to get something off the center.
Fitted with straps and the card fully opened, everything is completely flat.
Originally, a regular V mechanism is placed directly atop the central fold, the point of the V on the fold. Now the card is no longer flat. It's flat with a fence sticking up, a fence in the shape of a V with its point on the crease of the central fold.
When the card is shut, the force applied also forces the fence to fold. The fence inside is attached to both recto and verso sides and to itself with creases at each line of contact. As the card closes the shape of the V changes, it falls in on itself, the fences inside being forced shut collapse along their creases and are forced forward or backward at a compensating angle. The bridge that was standing up 90° from a flat open card is now laying flat at 45° with its opposite right on top of it sandwiched between the recto and verso pages. All that goes for content attached to the fences.
The idea is to attach stand up V mechanisms directly over the new displaced central folds. And now that they're doubled there are two places to attach V mechanisms with their double upright surfaces, not just one place to attach V mechanisms. And then there are two straps, so four new displaced central fold creases, each with it's own V mechanism presenting two surfaces each, so eight new upright surfaces to attach content in a zig-zag arrangement angled toward the viewer -- are you sensing how splendid this is? -- that all stretches and extends and then abruptly flips into position when opened and then compresses like an accordion which packs the V mechanisms and everything on them tilting content toward the viewer during that moment of closing, difficult to follow as a shutter of a camera, for some of the content, a reverse flip with a twist and tuck back into position.
You know what? I just realized this. I must make another of these and video it because describing it is goofy but seeing it open and shut with all that stuff flipping around, standing up, tucking back, is awesome.